

10 step process: How a garment is made from scratch
-
Idea
-
Pattern
-
Trim+fabric source
-
Shrink test
-
Sample
-
Marking/grading
-
Cut+sew
-
Dye
-
Print
-
Finish

A lot of brands (including us for our tees) source “off the shelf blanks” made by wholesale companies offering garments that are pre-made, ready to order and in stock to be screen printed or decorated by the retailer. It’s easy to call up the wholesaler or place your order online and have your goods within a few days for you to decorate. This is a great low cost way to start up a brand or continue to keep costs low while building your client base to generate a consistent flow of orders. But, this model comes with some restrictions when wanting to produce garments with a little more technicality or specific fashionable styles.
That’s where making garments from scratch comes in. This is a whole other beast that requires much more effort, money, patience, knowledge and time. I only recommend this pathway if you have flexible capitol to do so, have a large client base to make a return on your investment quickly or are ok making small batch quantities while paying a higher premium.
I’m going to explain the process of what goes into making custom apparel and a behind the scenes look at creating our sweat set pieces from scratch.
1. IDEA
It all starts with your idea for your garment. You can make a sketch or pick a garment you already own to base your new product from and make modifications to it which is what I did.
2. PATTERN
Garments are created in pieces. Like a puzzle. Each piece has a functionality and when put together completes the puzzle and reveals the image. A pattern maker will take your sample garment or sketch and add the modifications you want to create a paper pattern with each piece of the garment and instructions for the sewing team. The pattern maker can also help you determine how much fabric and trims you will need to source for the production and what that breaks down to for each garment.

3. TRIM & FABRIC SOURCE
What kind of fabric do you want to use? By visiting a local fabric manufacturer you can look at various swatches of different fabrics they have in stock or even make your own from combining different yarns or specific yarns to create something proprietary and special to your brand.
Since we’re doing basics we are sticking to the basics and using a nice heavy weight french terry fabric. If producing something like a sweater, sweatpants, jackets, etc. those have what are called “trims” which are smaller quantities needed for smaller portions that make up the garment like the arm cuffs, elastic waistband, drawstrings, buttons etc. So, you go to a different manufacture that sources those and find what you need.
4. SHRINK TEST
Fabrics are going to shrink after they are knitted because they are going to be washed and dyed. This will affect how your pattern is made for your garment. You can chose to either dye your fabric before you sew it or dye it after which is called garment dying. When garment dying, you need to test a sample yard of the fabric first to see how it will shrink so you can accommodate those measurements into your pattern before your first sample is made. This step is very important.


5.SAMPLING
Once the pattern is made it is taken to the sewing team so they can create your first sample to test for fit and shape and make sure all the details are accurate. You will need to make a few pattern adjustments and samples of this to get it accurate before moving on.
6. MARKING/GRADING
What size offering will you have in your line? We like to do XS-2XL. It is more costly the more sizes you add into your range because of the fee to create each size specifications. Sometimes, depending on the type of garment you are creating you have to make a whole separate pattern and samples for plus sizes to get an accurate fit which adds to the cost. This is why some brands are not able to offer plus sizes when starting out so that they can keep costs to a minimum. For the larger sizes you have to account for more fabric which then increases the price as well. The pattern is used as a place to start so usually you will pick a sample size that your pattern is based on. Most of the time it’s size small but can be whatever size you want or that the inspiration garment is. They take these measurements and create digital puzzle pieces for the garment in each size of your range printing it onto a long sheet of paper for the cutting team.


7. CUT & SEW
Your fabric is rolled out onto long tables in layers stacked on top of each other like ribbons of thin pasta. Then the long paper from the marking/grading service is placed on top as a template so the cutter can follow the shape pattern. They will start to cut each puzzle piece for each size of the garment and group them together by size for the sewing team to sew each piece of the puzzle together creating a complete garment.


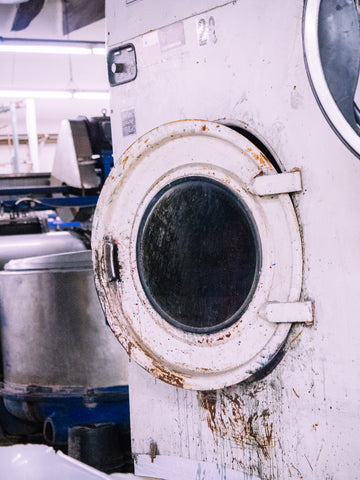
8. DYE
Once the production is finished on your cut and sew you can take your completed garments to a dye house. We used a local one that specializes in tie dye treatments and has eco-friendly practices. You will want to have already taken the time to make a test sample of your dye pattern when you had your initial samples made before production to save time. Samples are a must to ensure the outcome of your production is accurate.


9. PRINT
Once the pieces have all been dyed and processed they go to a screen printer to print any graphics onto the garments.


10. FINISHING
After printing they go back to the cut and sew manufacture to perform finishing services to each garment. This includes everything that will totally complete the garment to be ready to ship to the customer such as quality control checks, pulling aside any damages, adding size labels, hangtags, trimming off loose strings or yarns, and folding and packing for shipping.


Some large brands have all of these processes done in different locations around the world from growing cotton to spinning yarn to making the fabric to sewing and so on. So the amount of transportation involved in all of these situations can cause a lot of environmental impact. We use all local manufacturing for each step of the process so everything happens in close proximity and is therefore much less harmful on the environment.
We hope this general breakdown gives you a better understanding of what is involved in making just one piece of clothing.
Check out our custom made sweat sets here.
*All images shown were taken by us in our manufacturing facilities in Los Angeles.
1 comment
This is amazing. The amount of work and skill that goes into creating custom clothing is incredible. Thanks for sharing! I loved learning about the process. Also your Plant Slayer design is my favorite tee.